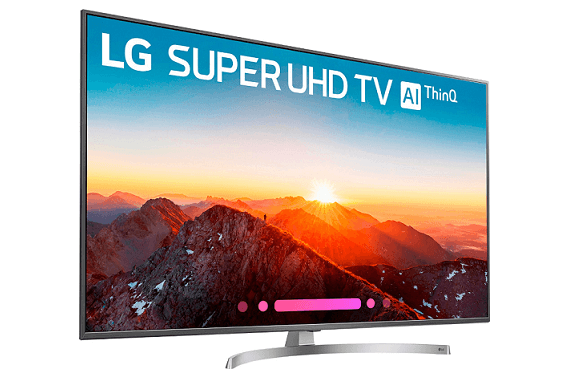
Like a TV that provides you mixed usage? The LG SK8000 satisfies this condition efficiently. It not only presents you with optimal motion handling, but it also gives you decent pictures as well.
Just like with any TV, you need some extra effort to get the best picture quality. Finding the best settings can be quite stressful and time-consuming. We understand this and decided to do the work on your behalf.
We have put all these settings together in this post to help you out. Ready? Grab your remote and let’s go.

Best LG SK8000 Picture Settings
We used the LG 55” to carry out our testing. However, we noticed that you can use the same settings for different versions of this TV. They include:
- 49” (49SK8000PUA)
- 65” (65SK8000PUA)
- 75” (75SK8070PUA)
Note that you can employ these settings for just about any kind of content. However, when using the TV as a monitor for your PC or gaming, you need a few tweaks. So how do you calibrate your LG SK8000? Check out our best settings below:
Energy Saving
This is the first thing you should do when calibrating your TV. If you don’t, there is a chance that your TV will dim or go into sleep mode while calibrating. It is also very important to disable “Eye Comfort.” If you don’t, the TV will adjust the color temperature settings automatically depending on your room conditions.
Picture Settings
Go to the “Aspect Ratio Settings” menu and switch your Aspect Ratio to 16:9. You should also switch Just Scan to “On.” With this setting, your LG SK8000 adjusts automatically to HDMI input without manual adjustments.
There are 10 picture mode presets, they include:
- Vivid
- Standard
- APS
- Cinema
- Sports
- Game
- HDR Effect
- Technicolor Expert
- Expert (Bright Room)
- Expert (Dark Room)
You can choose any of the last two. They work the same way with the only difference being the ambient light level.
Go to the “Picture Mode” menu and set your Backlight to 31. This is perfect for a dark room. You can tweak this to suit your room conditions. Note that this setting doesn’t influence your picture quality. Other picture settings you should adjust include:
- Contrast – 95
- Brightness – 50
- Sharpness – 0 (default value)
- Color – 50 (default value)
- Tint – 0 (default value)
Next, go to the “Expert Controls” menu and switch off Super Resolution and Dynamic Contrast. This is important if you don’t want any image processing. It is always best to view images as close to the original intention of the creator as possible.
After this, you can choose Auto for “Color Gamut.” This allows your LG SK8000 to automatically choose the best setting for each input. Leave the “Color Filter” Off as well.
Set “Gamma” to 2.2 since this is the standard for lots of movies and TV shows. In some cases, you may notice a loss of details when viewing dark scenes. All you need to do is adjust the Gamma settings.
Now, go to the “White Balance” menu and choose “Warm2” from the Color Temperature. Next, turn off “MPEG Noise Reduction” and “Noise Reduction” under the Picture Options menu. You don’t need them since most of your content is in high resolution. However, when viewing low-resolution content, you can turn both on.
Disable “Motion Eye Care” so that your TV doesn’t adjust brightness automatically to suit different scenes. Leave “Real Cinema” On since it doesn’t have any effect on content except 24p movies. Set the “LED Local Dimming” to Medium. If you are not satisfied with this, you can adjust it to suit your preference.
Luminance Settings
You can sort these settings depending on the condition of your room. It is all about adjusting the Backlight values for your LG SK8000. After running our tests, we discovered the following settings for different room conditions:
- Dark Room – 31
- Average Room – 67
- Bright Room – 100
Like we stated earlier, the Backlight settings do not alter picture quality. If the pictures are too dim or bright after adjusting these settings, you can tweak them a little to suit your needs.
HDR Settings
Not all players can detect that your TV supports HDR. The best way to fix this is to switch “HDMI ULTRA HD Deep Color” on. Do this for the HDMI port where you’ll be getting the HDR input. This will ensure that the different input devices detect your TV’s HDR capacity.


