You must be wondering why there is so much buzz about Ryobi drills. Well, many DIY enthusiasts believe you should have one of these in your home. This tool is a great addition to your toolbox for several reasons but that’s a story for another day.
The bone of contention in this post is the speed settings for a Ryobi drill. If you can get these right, then you’ll get the best from the drill. That’s what we’ll be showing you in this post.
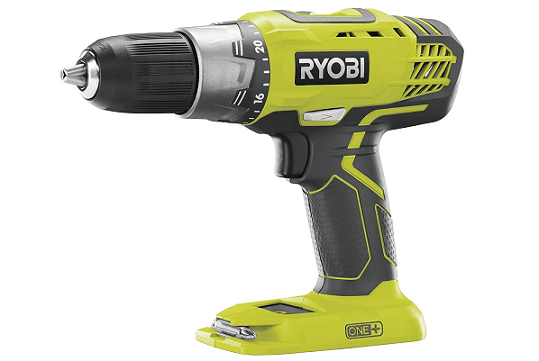
What’s the Ryobi drill for?
Are you planning to start a new DIY project dealing with wood? If your answer is yes, then you sure need a Ryobi drill. It is one of the most important tools for such tasks. There is so much you can do with the drill.
So what can you use this drill for? Of course, the first thing that comes to mind is drilling. You use this tool to drill holes into wood. Sometimes, it comes in handy for other drilling operations.
It is important that you understand what this drill is for. If you don’t, you might use it for the wrong operations. This means that you’ll either destroy the drill or you won’t use it to the fullest potential.
Why you need to get the drill speed settings right
Getting familiar with your Ryobi drill is just as important as knowing its purpose. This familiarity creates a great foundation for achieving great feats with this DIY tool.
If you understand how to set the drill, then you can manipulate it for different tasks. This is where you begin to enjoy the benefits of adding this drill to your tool arsenal.
Tips for Ryobi Drill Speed Settings
In this section, we will share a few tips to help you get the best of your new drill. Note that we cannot give specific settings because each situation is different and may require alternate values.
Before drilling
There are certain things you should get right before you set out to drilling holes. The first thing to do is to ensure that your power source or battery isn’t connected. Find the exact drill bit you need for the task at hand then insert it into the jaws of the drill.
The next thing to do is to tighten the bit to ensure that it doesn’t fly out while drilling. That can be very dangerous for you or anyone else around you. Do the tightening using your hands.
Next, check the clutch adjustment ring and choose the drilling application. This is how to sort out the drill setting. Now, ensure that the drill is put in the forward position. If you need high speed, you should adjust the drilling gear to position 2.
With all of this out of the way, you are ready to begin drilling. All that is left is to connect the power source or batteries.
Drilling
It is important that you hold the drill at the same level as the material you want to drill. Switch the drill on and then you can increase the speed at a gradual pace. The more the drill works into your material, the higher the speed should be. Once you have your hole set, you can release the drill trigger.
Before Driving
Make sure that the power source or battery isn’t connected. Look to the gear switch and choose a low speed on the speed setting. After this, increase the torque by raising it to a higher level. You can now reconnect your power source and start to drive.
Precision Driving
Start at the lowest level for the clutch setting. Drive the fastener then you can make adjustments to the clutch as you desire. If you notice that the screw doesn’t sink into your material completely, adjust the clutch settings. Keep increasing it gradually until you are satisfied.
If this is your first time drilling, you may find this a little challenging. However, with some practice, you should become a master of the game soon.
Here’s why you need to start at the lowest clutch setting. When you begin with a high setting, you are likely to drive the screw a little too deep into the material.
Gain more control with variable speed
Since the drill has a trigger for variable speed, it is best to begin drilling at the slowest speed. You can up your game gradually. This way, you have better control of the drilling and driving projects.
Final Tips
Here are a few things you should do when using a Ryobi Drill:
- Always have extra batteries.
- Tightly secure the drill bit.
- Practice as much as you can.
- Use the direction switch to change directions.

