Hisense is one of the biggest electronic companies in the world. This company knows its onions and has presented us with the Hisense 4K Roku TV. There’s so much to enjoy from this TV including high-quality images.
To get the best of this TV you need to use the best picture settings. How will know the best picture settings? We have the answer.
After lots of research, we have put together the best picture settings for Hisense 4K Roku TV. Want to know what they are? Read on.
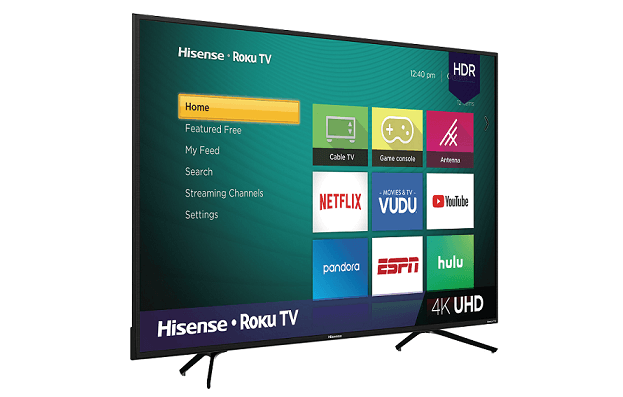
Best Hisense 4K Roku TV Picture Settings
For our study, we made use of the 55-inch version of this TV. We believe that these settings will also suffice for the 50-inch and 65-inch models. You can make use of these settings for many types of content.
If you want to play games or use this TV as your PC monitor, you make need to tweak some settings. Don’t worry, this isn’t rocket science considering how user-friendly the TV is. Enough talk, let’s check some picture settings.
Eco Settings
For the best results, you should first disable the Enhanced viewing modes. If you leave these unattended, the TV will alter your image settings automatically. You should also disable the Automatic Light Sensor in the Backlight menu. This is important so that the backlight doesn’t change while calibrating.
SDR Settings
This TV has several picture modes but we suggest that you make use of the “Theater Night” mode. With this mode, you have accurate images and enough room for customization too. After this, you should consider using the following settings:
- Contrast – 40
- Brightness – 50
- Color – 45
- Tint – 0
- Sharpness – 0
Note that brightness is only a processing option for images. As such, we think you should leave it at the default value of 50.
To control the TV’s backlight and local dimming features, you should tap on the Backlight sub-menu. You should set Local Dimming to High. However, if you are not satisfied with the results, you can make adjustments to suit your preferences.
You should also adjust the backlight based on the current viewing conditions in your room. The backlight setting also doesn’t affect the picture quality. Note that when the local dimming feature is enabled, you cannot alter backlight levels. Your best option is to disable local dimming before adjusting the backlight then enable local dimming.
Advanced Settings
Under the advanced settings menu, you can sort out color temperature, digital noise reduction, and noise reduction. For the color temperature, you can leave your setting at Low to get the best results. Switch off the other two features except when you are viewing low-quality content. Before you do, note that these settings may cause loss of clean details in certain scenes.
HDR Settings
On all the native apps on this TV, the HDR is enabled automatically. As you begin playing HDR content, you will notice a mini-HDR icon just beside the picture settings menu. Along with this, many of the settings on the TV will change automatically.
Leave all these settings the way they are except the Picture Mode. Here, you should switch to HDR Theater. If you will be load HDR content from external devices, you need to enable HDMI 2.0. Without this, older devices will likely have compatibility issues. The best thing to do is to enable this feature only when it is necessary.
Dolby Vision
This TV from Hisense supports Dolby Vision. That should be great news considering the kind of content in the market these days. The implication of this is that you can enjoy Dolby Vision from both local apps and external devices.
Just like your experience with HDR content, loading Dolby Vision content adjusts some settings automatically. We suggest that you leave these settings as they are. Don’t try to use your regular SDR settings.
Dolby Vision presents you with three picture modes and they are:
- Dolby Vision Bright
- Dolby Vision Dark
- Dolby Vision Custom
We suggest that you stick to the first one for the best results.
Gaming Settings
You don’t need to make too many changes to the SDR or HDR settings on your TV before gaming. A few tweaks will give you an amazing gaming experience. We suggest that you first switch to Game in the Picture mode menu. This will give you’re the least input lag possible.
After this, you can stick to your SDR or HDR settings. Note that if you are playing games in HDR, you need to switch on the HDMI 2.0 function.
Conclusion
There you go, the best picture settings for Hisense 4K Roku TV. If you think we left anything out, hit us up in the comments section.

