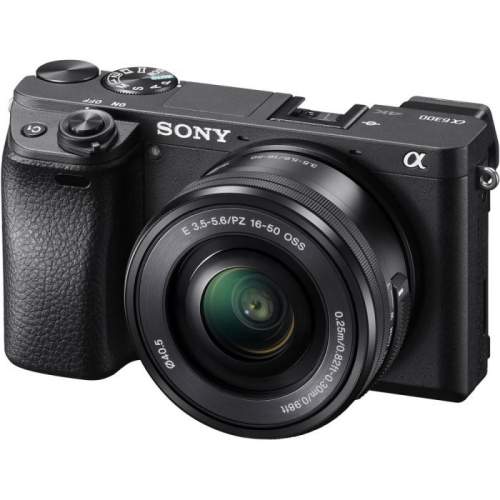
Sony A6300 is another top-quality camera produced by Sony. Super swift, it can shoot at 11fps in continuous shooting mode. It bears a 24.2-megapixel resolution. It has an advanced interchangeable lens, a tiltable LCD screen that can work perfectly for still photography, vlogging, and professional films. Its pictures will always be clear and smooth, with crisp natural colors.
It amplifies the capture of its subject 425 phase width/425 contrast-detection points over 84 percent of the sensor. 20.1mp stacked back-illuminated 1″ Exmor RS CMOS sensor w/DRAM, large-aperture 24-70mm1F1.8-2.8 ZEISS Vario-Sonnar T lens. Every time go-to for professional photographers and filmmakers, vloggers/bloggers, and everyday enthusiasts.
What is S-log2 in cameras?
S-log2 is a picture profile mostly associated with the Sony mirrorless cameras and is usually used by filmmakers. While It is the most-used, it is inarguably the most debated. It has a very flexible color palette and a liberal level of dynamic range, giving you the kind of creative control and flexibility that allows you to dial the exact look you want.
S-log2 is almost like RAW, but not in it’s processing capability- RAW does not just correct but also grades your footage. A lot of filmmakers and video shooters appreciate S-log2; However, camera users that have just begun to use the mirrorless camera may find it challenging to implant and customize their picture profile. To wit, these S-log2 settings for the A6300 camera have been put together to make work easy for recent switchers.
Best Sony A6300 SLOG2 Settings
These settings have been tried, and have proven to be the best S-log2 setting for the Sony A6300 camera.
Your first move should be setting PP9 on your camera menu and switching your Gamma to S-log2. Change your color mode to S-Gammut3.Cine, Black Level at 0 and adjust the range of the Black Gamma setting to Narrow and the level to -7.
After making these basic adjustments, you can go ahead and do the other settings in no direct order.
Change your Detail settings, too. When shooting in 1080p at 120fps your Detail should be set at 0. But if you’re shooting at 4k, set your Detail to -6. However, you can tweak these Detail settings- it will help in adjusting the amount of additional sharpness applied to your image via the picture profile.
Now we move to the saturation settings. Set it to +32. At this point, you have pushed the Saturation in-camera to the highest and this would save you time during post-production because you would not need to bring back the colors as you would if you were shooting in a flat Gamma profile.
Also, set your Color Phase to -2. If you tweak this, you would be able to control your image hues, helping you eliminate that unnecessary green and magenta tint that Sony cameras usually have.
The next thing you want to adjust is your Color Depth. Set all color values to +6. If you increase the Color Depth, you stand the risk of having a punchier color palette in your footage. But, of course, you can adjust this Color Depth setting to suit your subject and the environment you’re shooting in.
What You Should Know
When using S-log2, you do not need to shoot in RAW. This advice is just to save you the stress of going through all those settings. If you still decide to shoot in RAW, you’re not towing a wrong path.
If you do not properly expose your camera you might produce shadows that are filled with noise. To avoid this, overexpose two stops and bring it down later during post-production.
The picture profile can readily produce fourteen stops of dynamic range, but if it sits at an ISO base of 800 on eight-bit data, it might be on a path to disaster.
While this setting was tested and made for the A6300, we are positive it can work for other Sony mirrorless cameras, too.


)