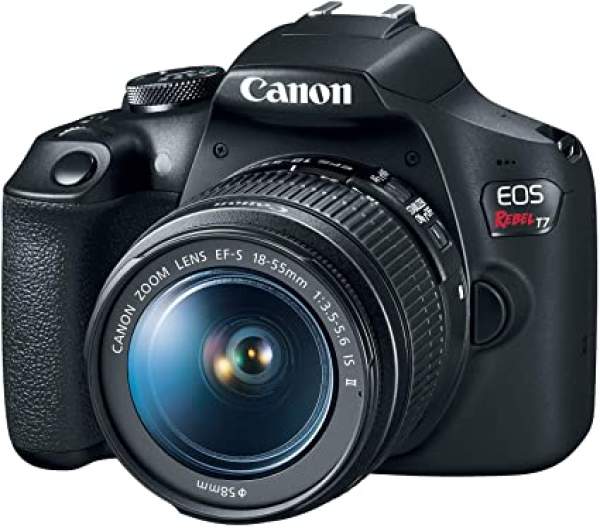
The Canon Rebel T7 is an entry-level DSLR camera that delivers good quality photos and upgraded features. It comes with a 24.1MP APC-C (22.3 x 14.9 mm) sized CMOS sensor and with the right settings, you can fully utilize what it’s offering.
If you’re new on the T7 scene or you’re just looking for the best settings to use for your Canon rebel T7, you’re at the right place.
Let’s look at my recommended settings you can use for different Captures on your Rebel T7.
Getting started on your Rebel T7 Settings
Getting Started on your Canon Rebel T7 can be straightforward or a bit confusing if you’re new to this. One of the best ways to go is to start with basic settings and work your way up, depending on your preference.
The Camera comes in Auto mode as default settings. This mode is pre-set to capture clear and clean photos/videos.
Next, you can adjust to get the right Shutter speed, Aperture, and ISO setting.
For your Shutter speed, reduce the speed by moving the Shutter speed button towards your left, until you get your desired view. This would help get brighter pictures as using a faster speed will give you darker photos.
For Aperture, first Click the AV button and then use the same roller you used for shutter speed to navigate.
For your ISO, click the ISO button and for the T7, it’s not recommended to exceed 800.
- The best setting for PhotosFirst make sure you are on Photo mode which it will most likely be in, and this can be done through the Mode dial. But it offers different options of specific photo modes.
- Set the Camera Mode dial to Intelligent Auto Mode. The icon with the A+. This mode is recommended because it can adjust to fit the type of photo you are about to take by automatically detecting what it is looking at.
- Select Live view mode. To enable preview photos on your LCD screen.
Now move to Menu.
On the first photo Tab;
- Image quality >> select Jpeg. You can decide to select the option that gives both Raw and Jpeg, and you can select any later. But for the T7, I would recommend selecting the Jpeg.
On the second photo Tab;
- Auto Setting Optimizer >> select Standard.
- Photo Style >> select Auto.
On the third Photo Tab;
- AF method >> select Quick mode. It would help track focus on your LCD screen.
These settings work for Portrait, Landscape, and Self photos. But with self photos, you can add settings using the Drive/self-timer mode.
- The best setting for Videos/Movies.
First, you should switch to Video mode which can be done using the Mode dial. The movie or video mode is the last option on the mode dial.
Next, you move to the Menu.
On the First Tab of the menu;
- Movie exposure >> select Auto. ( Manual will allow you to navigate exposure via shutter and Aperture but it is recommended if you’re familiar with Manual methods).
- AF method >> select Quick mode (will help track focus).
On the second Tab;
-
- Record size >> select 1920×1080(30). This would give you full HD. But If you want to have a slow-motion effect, 1280×720(50) will give you HD and help with that.
- Sound recording >> select Manual. This is really great for picking up specific Talking videos as it reduces the effect of ambient sounds. Then, select Rec. Level >> reduce it, making 12 the highest point.
On the Third Tab;
- Picture Style >> select Def 1 neutral. Click display to show options with def 1 neutral.
- Sharpness >> 0
- Contrast>> -2
- Saturation >> -3
- Colour tone >> 0
In conclusion…
This is the best setting for an amateur. These settings would ensure you get ahead with your photography and get the best out of your Rebel T7.
)