Do you want to learn about the best Adobe Premiere Pro sequence settings? Then this post is for you.
Adobe Premiere is one of the most popular video editing (timeline-based) apps in the world. Hundreds and thousands of people worldwide use Adobe Premiere or Adobe Premiere Pro to edit their videos.
Like many other Adobe software, this one is also full of innovative and useful features. In fact, all of these intricate features might become a little bit overwhelming for some users.

For instance, many users are not familiar with the sequence settings of Adobe Premiere Pro. But it is vital to know if you want the best experience while editing videos on Premiere Pro.
Without a proper sequence setting preset, you might see lags, glitches, black bars on your exported videos.
Because of that, we are going to share a few great sequence settings in this post. By the time you have read this post, you should have no problems implementing these settings on your own.
So, fasten your seatbelts and dive right in…
Adobe Premiere Pro Sequence Settings
In this section, we will share some Adobe Premiere Pro sequence settings with you. Now, depending on the type of video or the source of the video, or where you are going to share this video, the sequence settings might vary.
Thus, we will share multiple settings for you to try each of them and choose the one you like the most.
#1 For 1080p Videos
Generally, if you upload your videos online, then a 1080p output is good enough. Nowadays, most YouTubers also use 1080p videos. As a result, we will be sharing the best sequence settings for 1080p frame size at first. Now, let’s learn how to do that.
Steps to Follow
- First of all, launch the Adobe Premiere Pro on your PC or Mac.
- Now, you can bring out the sequence settings panel in 2 ways. First, you can hit the CTRL+N (for Windows) or CMND+N (for mac) keys simultaneously on your keyboard. Or you can navigate to the ‘File>New>Select Sequence’ option to bring out the sequence settings panel.
- Once you have done that, you will find many preset sequence settings already present in the sequence settings panel.
- Now, we will select any one of them and customize it. For example, let’s click on the ‘ARRI’ preset from the top.
- Next, select 1080P. Then select ‘ARRI 1080p 23.976’ from the dropdown menu. You can select any of the presets; we use the ‘ARRI’ presets, just for example.
- You need to click on the ‘Settings’ tab from the top bar of the sequence settings window.
- At this point, you will find all the sequence settings related to the ‘ARRI 1080p 23.976’ preset.
- But we will be customizing it to the best possible settings. So some settings will be changed from here.
- First of all, change the ‘Editing Mode’ to ‘Custom’ from the dropdown menu by clicking on the box next to the ‘Editing Mode’ option.
- On the ‘Timebase’ option, you can keep it at 23.976 FPS. For cinematic effects and YouTube videos, 23.976 FPS is enough. However, if you want smoother video, you can go up to 60 FPS.
- The ‘Frame Size’ should be 1920 horizontal and 1080 vertical.
- While the aspect ratio should be 16:9.
- Plus, the ‘Pixel Aspect Ratio’ would be ‘Square Pixels 1.o’.
- Again, the ‘Fields’ option would be ‘No Fields (Progressive Scan)’.
- And the ‘Display Format’ is good enough at ‘23.976 FPS timecode’. In the audio section, no need to change anything. They should be at ‘48000 Hz’ and ‘Audio Samples’.
- Now, the rest of the settings should be as it is.
- However, if you are bringing Apple ProRes videos to Adobe Premiere’s sequence, you can change the ‘Preview File Format’ option to ‘Quick Time’. And the ‘Codec’ should be ‘Apple ProRes 422 LT’.
- Remember, the above settings are not applicable if you bring the video from your phone, or memory card, or camera directly to Adobe Premiere. In that case, the ‘I-Frame Only MPEG’ option for the ‘Preview File Format’ settings would be OK. That means nothing to change here.
- Now, you can change the name of this sequence at the ‘Sequence Name’ box at the bottom of the window.
- Finally, to save this custom sequence setting preset, click on the ‘Save Preset…’ option from the bottom left corner of the window.
- It will bring out a pop-up window, where you can give it a name and write a description so that you can recognize it later.
- Finally, click on the ‘OK’ button to save the preset.
Once you have saved the preset, you can access it anytime you want to work with sequence settings in Adobe Premiere. Here’s how…
How to Access the Custom Sequence Settings Preset in Adobe Premiere Pro
- First, open Adobe Premiere Pro if you haven’t already.
- Press the ‘CTRL+N’ keys on your keyboard to bring out the sequence settings window on Adobe Premiere.
- Once all the presets load, scroll down to the bottom until you find the ‘Custom’ option and click on it.
- Instantly, you will find your newly saved sequence settings preset under the ‘Custom’ section.
- So select that preset by double-clicking on it. Or you can also click on it and then click on the ‘OK’ button.
- In doing so, the sequence preset will be loaded in the timeline automatically, and you can use that.
#2 For 4K or UHD Videos
Up until now, you have learned the sequence settings for 1080p or Full HD videos. However, what if you are going to edit or export 4K videos? Do you have to use separate sequence settings? Interestingly, yes.
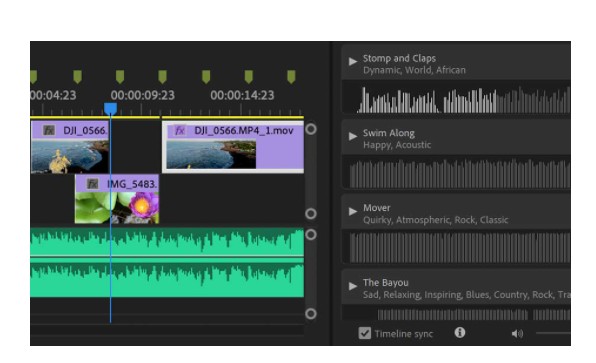
You will need to tweak a few settings in the sequence settings to get the best result in exporting 4K videos in Adobe Premiere Pro. In the case of 4K videos, almost all the settings will be similar to the previous settings except for the resolution or frame size.
So, let’s learn that as well…
Steps to Follow
- As always, open the Adobe Premiere Pro if you haven’t already.
- Then access the sequence settings window by pressing the CTRL+N or CMD+N shortcut keys on your keyboard.
- Once the presets are loaded, you can select any of the presets from the list. For convenience, we are going to choose the ‘ARRI’ preset once again.
- Then, you have to navigate to the ‘Settings’ tab by clicking on the ‘Settings’ option on the sequence settings window.
- Next, change the ‘Editing Mode’ to ‘Custom’ first. Also, the Timebase should be similar to the 1080p settings.
- Now, you will need to change the Frame Size to 3840 horizontal and 2160 vertical. And the aspect ratio should be 16:9 as usual.
- The rest of the settings should be similar to the 1080p settings we have described above. So we are not talking about them once again.
After that, you can save this preset and name it differently from the 1080p settings above. So that it is recognizable as the sequence settings for the 4K or UHD videos.
Exporting a Video with the New Sequence Settings
Now that you know the best sequence settings for editing in Adobe Premiere Pro. We will share the settings and options to choose when exporting any videos with these sequence settings.
For the record, we are going to describe 2 different export settings. Depending on your preference, you can try either of these. So, let’s go…
Export Settings #1
Steps to Follow
- There are several ways to export a video in Adobe Premiere. First of all, you can use the CTRL+M (for Windows) or CMD+M (for mac) shortcut keys to bring out the export window. Or you can navigate to the ‘File>Export>Media’ option to accomplish the same thing.
- In doing so, the ‘Export Settings’ window will appear on the screen where you can set a few settings on which the output video quality will depend.
- First of all, you need to select ‘H.264’ in the ‘Format’ section.
- Next, for the ‘Preset’, you can use any of the options from that dropdown menu depending on the type of the video. For example, if you want to upload a 1080P Full HD video on YouTube, you can choose the ‘YouTube 1080p HD’ option from there.
- Next, on the ‘Video’ tab, you need to scroll down and put a checkmark next to the ‘Render at Maximum Depth’ option by clicking on it.
- Also, you can optimally change the ‘Bitrate Encoding’ option to ‘VBR, 2 pass’. But the ‘VBR, 1 pass’ will do as well. Keep in mind, the ‘VBR, 2 pass’ option will offer the best quality video, but it will take longer to export.
- Plus, put a checkmark next to the ‘Use Maximum Render Quality’ option from the bottom section of the window
- After this, you don’t need to change any other settings or options.
- So, if you want to change the name of the file or choose the location where you want to save it, you can click on the blue link next to the ‘Output Name’ option.
- In doing so, a popup window will appear on the screen, where you can change the name of the video file and choose the location where you want to export it.
- After that, click on the ‘Export’ button on the ‘Export Settings’ window, and the export process will begin instantly.
Export Settings #2
This section will share a slightly different export setting compared to the previous one above for your video editing on Adobe Premiere Pro.
As some options and settings will be similar to the last one, we will not talk about all the settings in this section. Just the different ones will be described. So, here we go…
Steps to Follow
- As usual, open the ‘Export Settings’ window by pressing the CTRL+M or CMD+M keys on your keyboard at the same time.
- Next, for the ‘Format’ option, keep it ‘H.264.’
- Then, for the ‘Preset’ option, select the ‘Match Source – High bitrate’ option.
- Next, scroll down on the ‘Video’ tab from the center of the ‘Export Settings’ window. And, put a checkmark next to the ‘Render at Maximum Depth’ box.
- Then, under the ‘Bitrate Settings’, you can choose either the ‘VBR, 1 pass’ or ‘VBR, 2 pass’ option. We have talked about these settings in detail above. For more information, check that out.
- Now, change the ‘Target Bitrate (Mbps)’ from 10 to 15 Mbps.
- Similar to the previous settings, you need to check the ‘Use Maximum Render Quality’ box from the bottom of the window as well.
- Finally, you can export by clicking on the ‘Export’ button from the bottom right corner of the window
Concluding Thoughts
If you are still with us, then you know all the ins and outs of Adobe Premiere Pro sequence settings. We have tried to share the best settings for the best results.
So, upon using these settings, you will not notice any lags, or weird bars, or rendering issues on your videos from now on. At the same time, as you will be able to save these presets, you can use them right away the next time you need them.
Different people will indeed have different preferences. So, our provided sequence settings might not be good enough for your liking. In that case, you can use our settings as inspiration and tweak them to your liking.
On top of that, we have also shared a few tips here and there. So keep them in your mind as well.
As always, if you have any questions or suggestions, you can share them in the comments below. Plus, if you have found this post helpful, don’t hesitate to share this with others.
More Posts for You:


