So you might be a user of the SteelSeries Arctis 7. And, you want to get the best audio experience out of this headphone. In that case, you have come to the right place because we will share the best equalizer settings for the SteelSeries Arctis 7 in this post.
SteelSeries is known for offering high-end gaming peripherals. They have gaming keyboards, mouse, headsets, and more. The SteelSeries Arctis series has some of the best gaming headsets you can buy for your money.
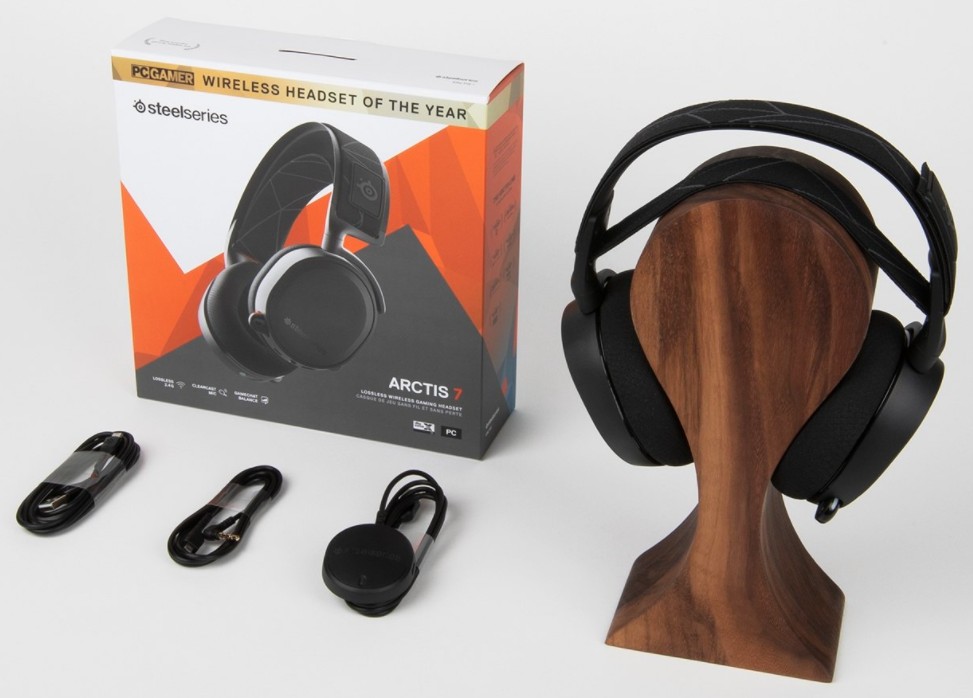
Among them, the SteelSeries Arctis 7 wireless headset came out in 2018. But to this day, this headset is dominating the market.
So, without dilly-dallying, let’s get to the point…
Best Equalizer Settings for the SteelSeries Arctis 7
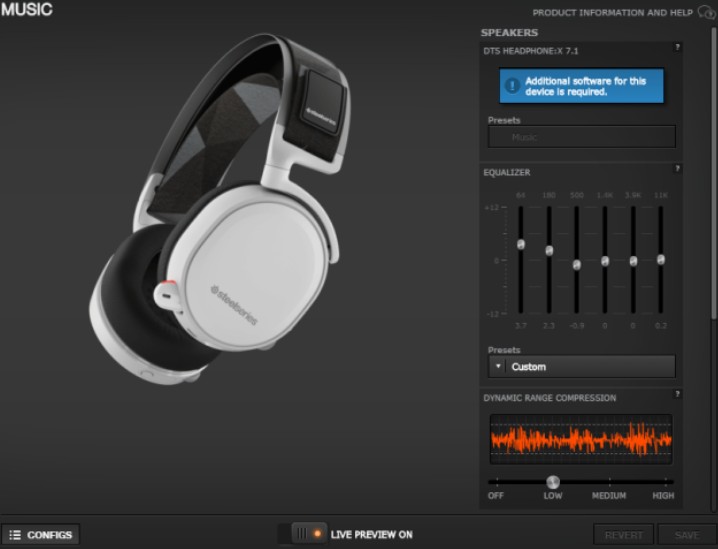
The SteelSeries Arctis 7 is undoubtedly one of the best gaming headsets out there. On top of that, it is a highly customizable headphone. But before you can customize the sound settings of the headphone, you will need to get the ‘SteelSeries Engine’ software.
So at first, you should download and install the ‘SteelSeries Engine’ on your PC or Mac. After that, you can replicate the equalizer settings by following our suggestions down below.
One thing to note is that there are no perfect or best equalizer settings for a headphone that will suit everybody. Also, depending on the activity you will be doing while using the headphone, the perfect equalizer settings would vary.
For instance, a particular equalizer setting could be great for gaming, but for listening to music, it might not work. As a result, we will share several equalizer settings for the Arctis 7 headphone in this post. You can try them one by one and choose the one you like the most.
Also, when customizing the equalizer settings, you will find that there are 6 columns under the ‘Equalizer’ section. The columns from left to right would be 64, 180, 500, 1.4K, 3.9K, and 11K.
We will explain the equalizer settings based on that order. So, let’s get to it…
Option #1 For FPS or Shooting Games
If you want to get a better experience while playing shooting games, you can try to use this equalizer setting.
Remember, if you want to hear the footsteps of your enemy in games like Call of Duty or Battlefield, you can also try this particular equalizer setting.
Equalizer Settings
- 64 – 1.9
- 180 = 0.4
- 500 = 2.7
- 4K = 5.5
- 9K = 10
- 11K = 7.4
- Dynamic Range Compression – Off
Option #2 For League of Legends Type Games
If you are a fan of LOL or League of Legends, you can use this particular setting on the Arctis 7. This equalizer setting will come in handy if you are playing games that also depend on voice chat.
Equalizer Settings
- 64 = -4.1
- 180 = -10.8
- 500 = -1.4
- 4K = 8
- 9K = 6.7
- 11K = 6.7
- Dynamic Range Compression – Off
Option #3 For Music Listening
Although, you will be using your SteelSeries Arctis 7 for gaming purposes primarily. You can actually use it to listen to music. If you have configured it properly, it can actually offer a great music listening experience. Here is an equalizer setting that will work great for music listening.
Equalizer Settings
- 64 = 3.7
- 180 = 2.3
- 500 = -0.9
- 4K = 0
- 9K = 0
- 11K = 0.2
- Dynamic Range Compression – Low
Option #4 For Immersive/Open World Games
If you are looking for an equalizer setting for playing open-world or immersive games like Assassin’s Creed, GTA, or Spiderman, then you can check this one out.
Equalizer Settings
- 64 = 4.1
- 180 = 1.9
- 500 = 0.3
- 4K = 0.1
- 9K = 1.8
- 11K = 1.1
- Dynamic Range Compression – Off
Option #5 Good For Everything
If you are looking for an equalizer setting that will be good for everything, whether you are gaming or listening to music. So, let’s check that out.
Equalizer Settings
- 64 = 3.4
- 180 = 4.7
- 500 = 1
- 4K = 2.2
- 9K = 2.4
- 11K = 5.9
- Dynamic Range Compression – Off
As of now, we have shared 5 different equalizer settings of the SteelSeries Arctis 7. But as you know, even these settings might not be suitable for you. In this case, we will share a few more tips so that you can find the perfect equalizer settings on your own.
Tip #1 Use the Smiley Preset
If you don’t want to customize the equalizer, you can choose a setting from the presets. For instance, if you are playing Fortnite, you will need to hear the gunshots or footsteps of your enemy to get the best out of your headphones.
We have seen that the ‘Smiley’ preset is very helpful in hearing the gunshots or footsteps or any minor details in-game while using the Arctis 7.
Tip #2 Use the Immersion Preset with a Slight Tweak
Are you a Rainbow Six: Siege player? Then, you can use the Immersion preset with a slight tweak. Here are the equalizer settings for such games.
Equalizer Settings
- 64 = 6.2
- 180 = 4.5
- 500 = 3.1
- 4K = 1.3
- 9K = 3.5
- 11K = 1.3
- Dynamic Range Compression – Low
Here, we have kept the DRC (Dynamic Range Compression) on low mode. This will help you to hear footsteps or gunshots clearer and louder. Also, the explosions would be a bit softer.
Tip #3 For PUBG
For PUBG players, it seems that the default preset is enough. Many users have reported that the default preset allows them to hear all the gunshots, footsteps, and more minor details in PUBG without any need for customization. So you can try that too.
Tip #4 For More Bass
If you are looking for more bass and punchy sound, you can actually use the ‘Music’ preset. Of course, this preset would be great for listening to music.
At the same time, you can also use it for FPS games. At the same time, bear in mind to keep the DRC to ‘low’ for smooth and even sound output.
Tip #5 Use the Live Preview Option
There is a ‘Live Preview’ option at the bottom of the page to customize the equalizer settings on the ‘SteelSeries Engine app. It would be best if you took advantage of it while customizing the EQ settings.
For example, let’s say you want to set an EQ for Cyberpunk 2077.
Now, you can turn on the ‘Live Preview On’ option on the SteelSeries app. Then keep running the game in the background and tweak each of the EQ columns one by one to hear the live feedback in real-time.
However, you can also open a YouTube video of that particular game you want to customize the EQ settings for in the background.
So, you will not have to play the game simultaneously while customizing the EQ settings. Also, you can look for videos like ‘Call of Duty footsteps sound’/’PUBG gunshot sounds’ on YouTube specifically.
Then you can play those specific videos and try to customize the EQ settings while keeping the ‘Live Preview’ option on. This way, you will be able to get the feedback in real-time.
If you want to view video content about the best settings for Arctis 7
Here are 4 YouTube videos that show some good settings for the Arctis 7 and you can watch and see for yourself if it works best for you or not
Summing up on Arctis 7 Equalizer Settings
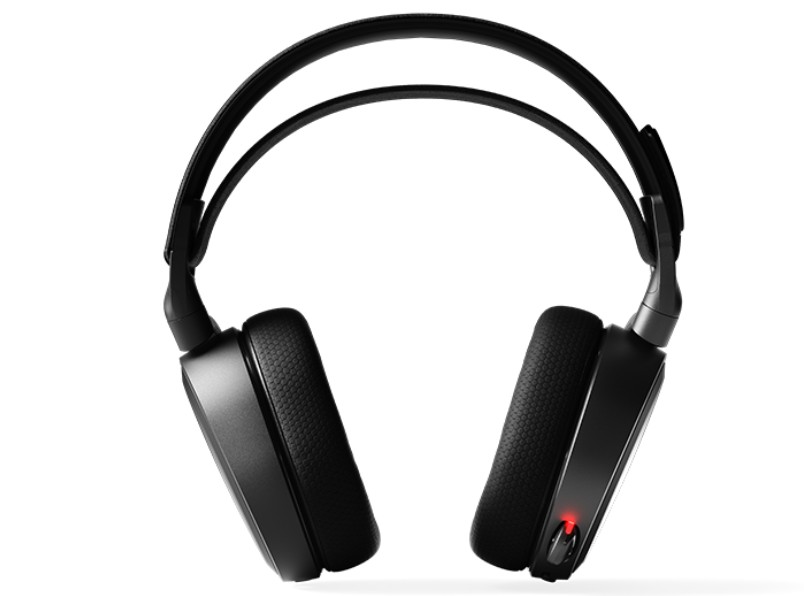
The SteelSeries Arctis 7 might be a few years old now. But this wireless/wired headphone is still a popular one to gamers worldwide. This headphone is available in black and white colors.
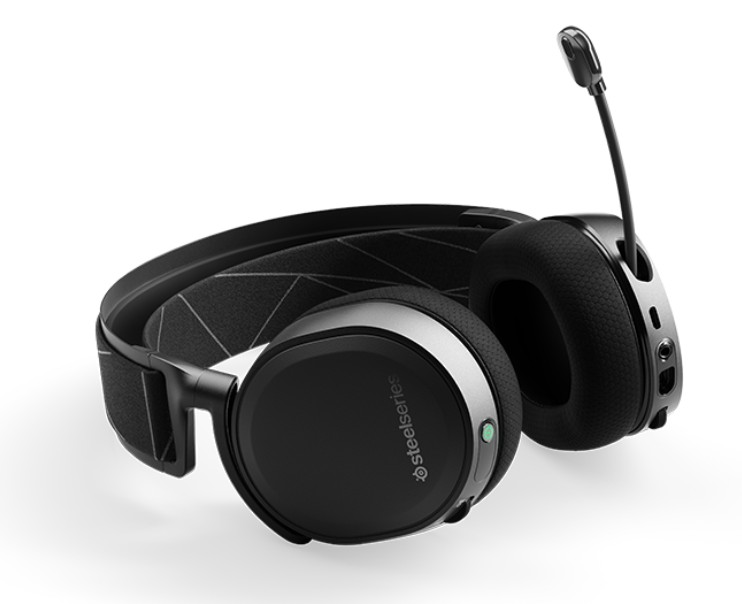
Also, it comes with a Discord-certified ClearCast bidirectional mic. So, it can also be a great streaming headset. In this post, we have shared a few different equalizer settings for the Arctis 7.
In addition, we have also shared some useful tips to improve the user experience of this high-end headset. We believe this post will come in handy.
On the other hand, if you have found out that these settings are not optimum for you, you can always tweak them slightly and customize them to your liking.
Before you go, don’t forget to share this post with others. Plus, if you have any queries or opinions to share, you can let us know in the comments below!
Frequently Asked Questions about Arctis 7 Best Settings
Here are some common questions people asked online regarding the Arctis 7 settings
Can you actually EQ without these special headphones
YES. You can. You will need to invest $11 for the Dolby app, but it’s totally worth it
More Posts for You:

